DIY Quick Fixes for Minor Rental Damages Before Moving Out
Taking the time to fix minor rental damages before moving out isn’t just about being a good tenant—it’s about protecting your security deposit.
With a few simple repairs, you can transform wear-and-tear issues into a restored living space that your landlord will appreciate.
Let’s explore common rental damages and the DIY solutions that can save you money.
1. Assessing Rental Damages
Before grabbing your tools, conduct a thorough walkthrough of your rental:
- Check walls, floors, doors, and fixtures for any damage
- Review your lease agreement to understand what repairs are your responsibility
- Make a list of issues that need addressing before your landlord’s inspection
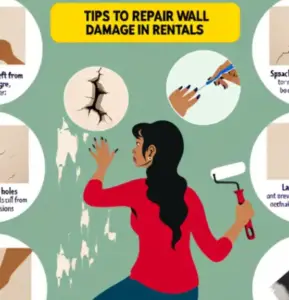
2. Fixing Wall Damage
a. Patching Small Holes from Nails and Screws
Those tiny holes from hanging pictures are easy to repair:
- Materials needed: Spackling paste, putty knife, fine-grit sandpaper
- Steps: Fill holes with a small amount of spackling, smooth with the putty knife, let dry completely, then sand until flush with the wall
- For a perfect finish, touch up with matching paint using a small artist’s brush
b. Repairing Larger Holes or Dents
For holes larger than a quarter:
- Use a wall patch kit for holes up to 6 inches
- Apply joint compound over the patch, let dry, sand smooth, then prime and paint.
- For textured walls, use a texture spray to match the surrounding area before painting.g
c. Removing Scuff Marks and Stains
Try these methods before repainting:
- Magic erasers work wonders on most scuffs and marks
- For stubborn stains, mix mild dish soap with warm water
- Always test cleaning solutions on an inconspicuous area first
3. Flooring and Carpet Fixes
a. Fixing Scratches on Hardwood Floors
- For light scratches, use a wood marker that matches your floor color
- Deeper scratches may require wood filler, which should be applied, dried, and sanded before applying a matching stain
- Apply a thin coat of polyurethane for a consistent finish
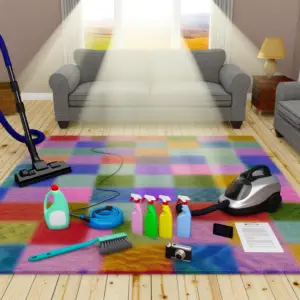
b. Removing Carpet Stains
- DIY solution: Mix equal parts white vinegar and water with a small amount of dish soap
- Blot (don’t rub) the stain, working from the outside in
- For stubborn stains, sprinkle baking soda, spray with the solution, let sit for 3 hours, then vacuum
c. Repairing Minor Tile or Vinyl Floor Damage
- Fill vinyl cracks with a floor repair kit matching your flooring color
- Replace individual broken tiles by carefully removing grout, lifting the damaged tile, applying new adhesive, and setting a replacement tile
 4. Door and Cabinet Repairs
a. Fixing Loose Cabinet Hinges and Knobs
- Tighten loose screws with an appropriate screwdriver
- If screw holes are stripped, insert wooden toothpicks with wood glue into the hole before reinserting the screw
- Replace missing hardware with identical or similar pieces from hardware stores
b. Repairing Scratches or Dents on Wooden Doors
- Fill deep scratches with matching wood filler
- For shallow scratches, try rubbing a walnut or a matching wood touch-up marker over the area
- Sand lightly and apply a matching stain or paint to blend repairs
c. Preventing Door Scuffs and Marks
- Clean existing scuffs with a magic eraser or diluted wood cleaner
- Install rubber door stoppers to prevent future wall damage
5. Bathroom and Kitchen Touch-Ups
a. Unclogging and Cleaning Drains
- Pour 1/2 cup baking soda followed by 1/2 cup vinegar down slow drains, wait 30 minutes, then flush with hot water
- Use a drain snake for stubborn clogs before trying harsh chemicals
b. Fixing Grout and Caulking Issues
- Remove old, moldy caulk with a caulk removal tool
- Clean the area thoroughly and let dry completely
- Apply a thin, even bead of mildew-resistant caulk alone g seams
- For grout, use a grout pen to refresh discolored areas or apply new grout after removing the old
c. Removing Hard Water Stains and Mold
- For hard water stains, apply white vinegar or a commercial lime-away product
- Remove mold with a mixture of 1 part bleach to 4 parts water (wearing gloves and ensuring good ventilation)
- For persistent issues, try a paste of baking soda and water, let sit for 30 minutes, then scrub
6. Light Fixtures and Electrical Repairs
a. Replacing Burnt-Out Light Bulbs and Fixtures
- Replace all burnt-out bulbs with the correct wattage and type
- Clean light fixtures by removing covers and washing with mild soap and water
- For ceiling fixtures, turn off the power at the breaker before cleaning or replacing
b. Fixing Loose or Damaged Outlet Covers
- Turn off the power at the breaker before working on any electrical fixtures
- Replace cracked covers with new ones that match the original style
- Tighten loose screws on switch plates and outlet covers
c. Repairing Small Appliance or Fixture Issues
- Tighten loose ceiling fan blades and clean thoroughly
- Secure wobbly towel racks or curtain rods by tightening the mounting hardware
- Lubricate squeaky door hinges with WD-40 or silicone spray
7. Final Cleaning and Pre-Move Walkthrough
Once all repairs are complete:
- Deep-clean all surfaces, appliances, and fixtures
- Vacuum and mop all floors, including hard-to-reach areas
- Take photos of all repairs and the overall condition of the unit
- Conduct your final inspection, checking all areas you’ve repaired
READ: How to avoid rental deposit deductions
Getting Your Deposit Back: The Final Word
These DIY fixes require minimal investment but can save you hundreds in potential security deposit deductions. By addressing minor damages before your landlord’s inspection, you demonstrate responsibility and care for the property. Not only will you likely get your full deposit back, but you’ll also leave the space in great condition for the next tenant—good rental karma that always comes back around.
Remember to document everything with before-and-after photos and keep receipts for any materials purchased. With these simple repairs and a thorough cleaning, you’ll be well-positioned for a smooth transition to your next home.
Renter-Friendly Wall Repair: Fixing Holes Without Losing Your Deposit
Related posts:
 Renter-Friendly Wall Repair: Fixing Holes Without Losing Your Deposit
 How to Properly Clean Carpets When Moving Out of a Rental
 Top 7 Rental Cleaning Services That Guarantee Your Deposit Back
 Common Rental Deposit Deductions and How to Avoid Them
 Understanding Your Rights: Security Deposit Laws by State
 Top 5 Rental Deposit Protection Services Worth Your Money